Showing posts with label Windows 10. Show all posts

Monday, December 10, 2018

How to Quickly Format a Drive and Disk in Windows 10?

Whenever you brought a new hard drive or want to install Windows on your system, it is important to format the drive before you use it to store your important data. Usually, formatting means deleting any of your existing data or information on your drive and also setting up the file system so that your Windows 10 operating system can easily be able to easily read and write data to the drive. There are high chances that your drive might be used with some another file system in which case you won’t be able to install Windows 10 because it won’t understand the file system and thus, can’t read or write data to the drive.
Now to solve this issue mentioned above, you need to format your drive with the proper file system, and then your drive will be ready to use with the Windows 10 operating system. While formatting the drive, you have to choose from these given file system like FAT, FAT32, exFAT, NTFS, or ReFS file system. It can also show you the option to do a quick format or full format.
format1-10829560
Here we discuss the complete steps to format a drive and disk in the Windows 10 quickly.
Steps to Quickly Format a Drive and Disk in Windows 10
Generally, the time required to format any drive mostly depends on the size of the disk but you can make sure about one thing is that quick format will always complete quickly in comparison to full format. We recommend you that before following the steps you must have to create a restore point and backup only if in case something goes wrong. Here how to do it:
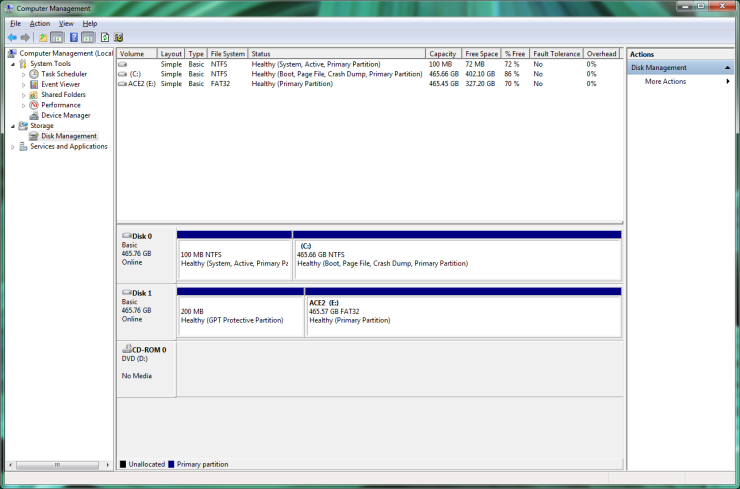
Format Disk or Driver in File Explorer
  1. Click the Windows + E keys together on your keyboard to open the File Explorer.
  2. Then, click to open “This PC option.
  3. Right-click on the drive that you want to format.
  4. From the context menu choose “Format” option.
Note: when you format the C: Drive, after that you won’t be able to access the system because your operating system would automatically be deleted once you format this drive.
  1. After that, from the File System drop-down menu choose the supported file system like FAT, FAT32, exFAT, NTFS, or ReFS, choose according to your use.
  2. Ensure that you leave the allocation unit size option to “Default allocation size.”
  3. Under the “Volume Label” field, name this drive anything you want.
  4. Next, choose check or uncheck the “Quick Format” option, it usually depends on what you want like quick format or full format.
  5. Lastly, review your choices and then click on the Start tab.
  6. Click on the OK tab to confirm your action.
Emma Justine is a McAfee product expert and has been working in the technology industry since 2002. As a technical expert, Emma has written technical blogs, manuals, white papers, and reviews for many websites such as mcafee.com/activate.

How to Optimize and Defrag Windows 10 Drives?

For proper functioning of the computer system, it is necessary to improve the performance of your computer and to help with this Windows 10 performs disk defragmentation once a week for hard drives. But now, by the default settings, the disk fragmentation automatically runs on a weekly schedule at a specific time which is already set in the automatic maintenance of your computer system. Also, you can manually optimize or defragmentation of your drives on your computer system.
However, disk defragmentation now re-arranges all the pieces of data which spread across your hard drive and stored them again. Whenever the files are written to disk, it is broken into many pieces as there is not sufficient adjacent space to easily store the comprehensive file on time, thus file become fragmented.

Generally, defragmentation decreases the file fragmentation thus improving the speed by which the data is written and read to disk which ultimately increases the performance of your computer system. While the disk fragmentation also helps in cleaning the disk, therefore, increasing the overall storage capacity.
Here we will discuss the complete steps of how to optimize and defrag Windows 10 drives.
Steps to Optimize and Defrag Windows 10 Drive
Before continuing the process, we suggest you create a restore point on your system it will protect your data if something goes wrong. And follow the steps in a given sequence to make steps easier. Here how to do it:
  1. Click the Windows + E keys together to open File Explorer.
  2. Then, double-click on the ThisPC option.
  3. Right-click on any hard drive partition that you want to run defragmentation for.
  4. After that, choose Properties option.
  5. Change it to Tool tab and then click on the “Optimize” in the Optimize and defragment the drive.
  6. Choose the drive for which you want to run defragmentation for.
  7. Next, click on the Analyze button and check it needs to be optimized.
Note: check if your drive is fragmented more than 10%, then it should be optimized.
  1. To optimize the drive, click on the Optimize button.
  2. Wait for a few minutes; the defragmentation process will take some time which depends upon the size of your disk.
  3. Close all the tabs.
  4. And finally, restart your system.
Emma Justine is a Microsoft Office expert and has been working in the technology industry since 2002. As a technical expert, Emma has written technical blogs, manuals, white papers, and reviews for many websites such as office.com/setup.

Monday, December 3, 2018

How to Turn On or Off Full Screen Optimizations on Windows 10?


The Full-Screen Optimization is a Windows 10 feature which helps the operating system to function better. By default, it is enabled for applications such as video games and players. Whenever this Full-Screen Optimization feature is enabled, then the video playback and gaming experience are automatically increased by prioritising the GPU and CPU resources for that particular process.
However, sometimes when it is in the screen-mode, then it results in a drop in the frame rate (FPS). That time, there is one solution to fix these frame drops issue would be to disable these full-screen optimisations, but unluckily, Microsoft in its recent release has removed this feature for Windows 10. But here are some ways by which you can still be able to get this done. Here is how to do it.
1-disable-fullscreen-optimization-for-games-on-Windows-10
Steps to Enable or Disable Full-Screen Optimizations
In this article, we provide you with two simple ways by which you can surely be able to solve this issue. The two simple methods are as follows:
  • Use the Windows 10 Settings.
  • Use the Registry Editor.
But before starting the process, we suggest you that use the given steps in a given sequence, by doing this will take your less time and also helps you by preventing you from different errors.
Method-1: Use the Windows 10 Settings
For previous releases, you need to follow this method. Though, this method is not available for the releases starting Windows 10 v 1803. The steps are discussed below:
  1. Firstly, open the Windows 10 Settings app.
  2. Now, go to the System section.
  3. Then, under the System section, go to the Display
  4. Next, under the Display tab, navigate to the Advanced graphics settings or Graphics Settings option.
  5. Under the Advanced or graphics settings section, labelled as Full-screen optimisations.
  6. Now, unmark the option labelled as Enable Full-screen optimisations to disable the feature easily.
Method-2: Use the Registry Editor
  1. Press the WINKEY + R keys together on the keyboard to open the Run utility tab.
  2. Type the command “regedit” in the command box.
  3. Click on the Enter key.
  4. Then, click on the Yes option for the User Account Prompt which you get on the screen.
  5. Once the Registry Editor Option opens, then go to the following key location:
  • HKEY_CURRENT_USER\System\GameConfigStore
  1. Next, right-click on the Explorer tab.
  2. Choose “New” option.
  3. Under” New” section, select and click on the DWORD (32-bit) Value.
  4. Now, give a name to the newly created DWORD TO GameDVR_DSEBehaviour.
  5. Click on Enter to save it.
  6. Finally, double-click on the Game DVR_DSE Behaviour DWORD and then set its value to the following, it fully depends on your choice or requirements:
  • Disable Full-screen optimisations.
  • Enable Full-screen optimisations.
After you completed the steps, close the Registry Editor and restart your computer system for the changes to take effects successfully.
Emma Justine is a Microsoft Office expert and has been working in the technology industry since 2002. As a technical expert, Emma has written technical blogs, manuals, white papers, and reviews for many websites such as office.com/setup.

How to disable a device in Windows Device Manager?

If you’re facing some problems due to enabling device and if disabled it, Windows will no longer assign system resources to the device and...